 Windows Vista made several changes and additions to the way folders are displayed. The most obvious change is the Live folders; subtler is the addition of the Data folder. The Data folder is often mistaken for a Live folder, but is, in fact, simply a folder, with another folder inside of it. It is used whenever a folder contains one or more sub-folders. The Data folder is used even if those folders are empty. Windows Vista made several changes and additions to the way folders are displayed. The most obvious change is the Live folders; subtler is the addition of the Data folder. The Data folder is often mistaken for a Live folder, but is, in fact, simply a folder, with another folder inside of it. It is used whenever a folder contains one or more sub-folders. The Data folder is used even if those folders are empty. |
Day, 6 (Tuesday, August 12th, 2008)  |
| Like the Open folder, and the Live folder, we will be able to use our pervious work to create the Data folder, in fact we will be using the Open folder almost without change for the exterior folder. The bulk of our work will be to create the interior folder, and fill that folder with a file. We will pretty much be following the same exact formula Microsoft uses to accomplish this.
Ingredients:
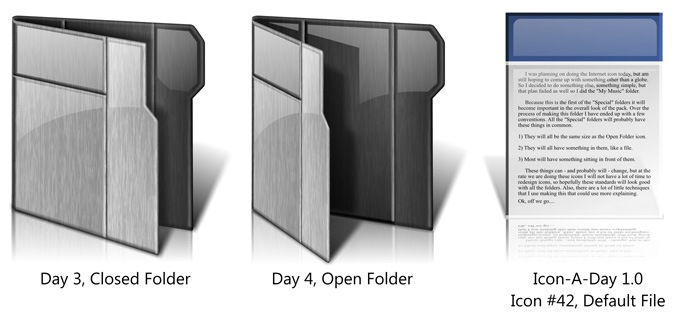
Like I mentioned, we have already done the bulk of the work for today's icon. We will be using the Closed folder, and the Open folder from days 3 & 4, as well as the Default Document file from the Original Icon-A-Days series. With minimal changes we should be able take these assets and make our brand new Data folder.
 |
| Step 1:
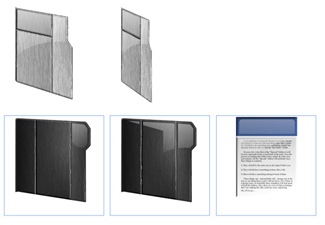
Gather our 3 icons together in one file. Once we have them together we can delete the elements we will not be using, like the reflections and the shadows.
 | Step 2:
To make things a bit simpler, before we can start putting our assets together we need to group some things. I need to group the fronts and the backs of both folders together, and this will help us control our Z order. Once I have the groups made, I nudge our elements out of the way.
 | | Step 3:
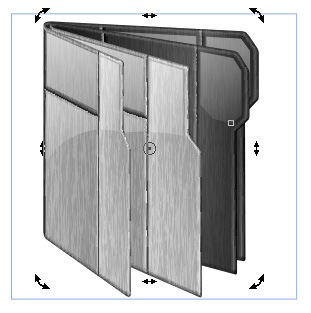
Now we simply put our Closed folder inside our Open folder. In its current state it looks pretty silly, but with a some sizing, and skewing, we can wrestle it into an acceptable position.
 | Step 4:
Now, in order to make the inner folder stand out, I will go in with the Mesh tool and tweak the colors and mesh. In this case I want to make the folder front darker, and the folder back lighter.
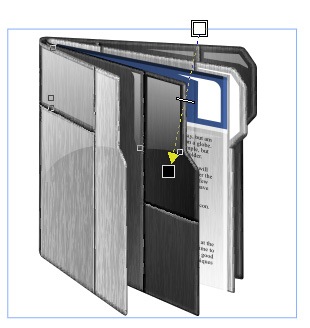
 | | Step 5:
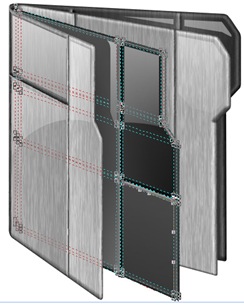
Once I am happy with the folders, I need to place the file inside the center folder. We could spend some time on this, but I think that we can get away with simply sizing the file, and skewing it. Just to polish it up a bit I use the Shape tool to modify the bottom of the file to better match the perspective.
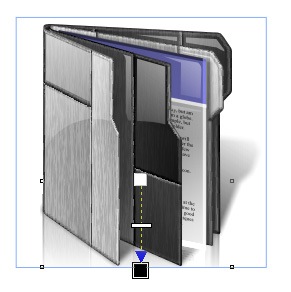
 | Step 6:
Now that all of our elements are in place, we need to go through and touch up our gloss since the existing gloss no longer looks correct.
 | | Step 7:
Last we need to go through and create new shadows and reflections. Once again check Corel For Skinners for more of the techniques used.
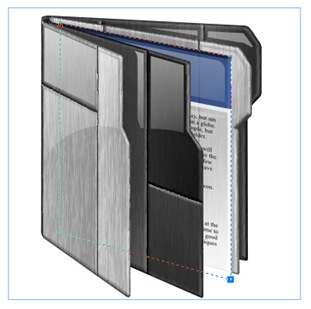
 | Finished Icon:
Using the Data folder, in conjunction with the Open folder and the Live folder icons, we should be able to completely replace all the standard folders in Windows Vista.
 | |
| Wrap Up:
Now that we have all of our standard Vista folders, tomorrow we will begin tackling the Vista USER folders. These folders are used for the special folders in the users directory. In Vista they are represented quite differently than the standard folders, represented by glassy plastic folders. This is a convention that I am becoming fond of, however we will try and do something a bit different. Join me tomorrow, and we will both find out what. |
All Icon-A-Day artwork, copy, and icons, are copyrighted by Paul Boyer © 2008, and may not be used with out express permission. |