 As we enter week three of the Icon-A-Day 2.0 tutorial series I stop and ponder, why, why am I doing this? well the answer seems pretty simple: I am crazy. Of course, this seems to come up often on Mondays. Luckily my insanity is of a variety that won't let me give up on a project once I said I would do it, so with that said, let us dive back in to the User folders with one of Vista's brand new special folders. The Downloads folder. As we enter week three of the Icon-A-Day 2.0 tutorial series I stop and ponder, why, why am I doing this? well the answer seems pretty simple: I am crazy. Of course, this seems to come up often on Mondays. Luckily my insanity is of a variety that won't let me give up on a project once I said I would do it, so with that said, let us dive back in to the User folders with one of Vista's brand new special folders. The Downloads folder. |
Day 11 (Monday, August 18th, 2008)  |
|  The Downloads Folder The Downloads Folder
The Downloads folder one of the new User folders Windows Vista. It is simply a default location for downloaded media, and you can change it simply enough, however it is kind of nice if you want to keep track of the assorted goodies you get from your favorite web sites and IM friends. It is also user specific, so every user on your computer will have their own place to keep their downloaded content.
This is also one of the more boring icons in the new User folder structure. By default it is simply a folder with a blue arrow pointing down. Since it is Monday I am inclined to do something simple, so we will be doing something similar, however we will be bringing in one of the icon conventions that we established in the original Icon-A-Day series. Hopefully we will be able to raise the bar above Vista while still keeping it simple.
|
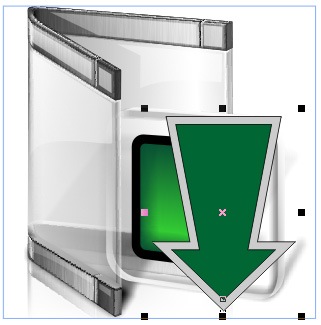
| Step 1:
Once again we will start by gathering our ingredients, in this case we only have two, our Wrapper folder, and the Log Off Icon, #73. Then we get rid of the elements we are not going to be using. However take not of the key, we will be using the same techniques to create a new Downloads arrow.
 | Step 2:
Now, sadly, we need to flip our glass plate, since it does not look very fitting when I try and place it in the folder. This is going to require us to do some tweaks to the lighting and perspective.

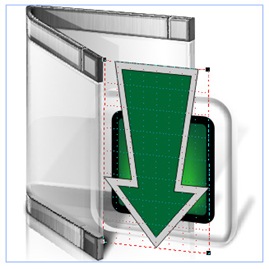
| | Step 3:
Now we go in and do our tweak. I start by skewing the glass square up a bit, and then skewing the shadow down a bit.
Next we tweek the top left corner up a bit, as well as the blue rectangle, since our perspective does not match exactly.
I strongly recommend looking at the original post #32, and #73. The techniques used to do the glass, are exactly the same as we will use today.
 | Step 4:
Now, for some reason, I've always associated the downloads arrow with green, so I will be doing a new green arrow. Before I do this I use the mesh fill to change the blue rectangle to green.
Then I simply draw a nice, new, flat 2D arrow. Once I am happy with our arrow, I give the arrow a small inside contour with the contour tool.
When we have our contour, we break the contour apart and then re-group the two objects, the arrow and its outline.
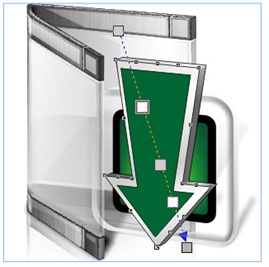
 | | Step 5:
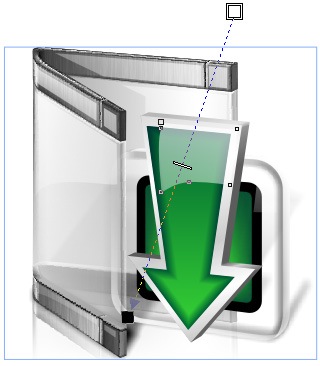
Now we will use the Perspective tool to adjust our arrow to were it looks correct; sitting out a bit in front of our glass plate. We will be giving it bit of an extrusion, so we have to make sure we leave room for that.
Now we bust out one of the classics, what I like to call a "poor mans bevel," and extrusion.
| Step 6:
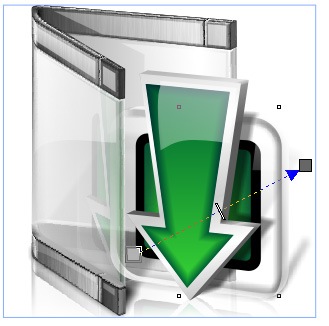
I simply ungroup or new arrow, shift the green a bit down and to the left. Then I copy the gray area, and shift it up and to the right, and drop it back behind the original. Then with the Shape tool I adjust the corners so they meet up.
With the Interactive Fill tool, I give our bevel a nice gradient fill and the extrusion, another darker and more elaborate fill.
 | | Step 7:
Next we use another classic technique; I give our arrow a gradient fill from green to darker green. With the Contour tool do a 20 step inside contour with a fill from dark green to light green. This gives us that inner glow, that are the hallmark of the Icon-A-Day 1.0 icons.
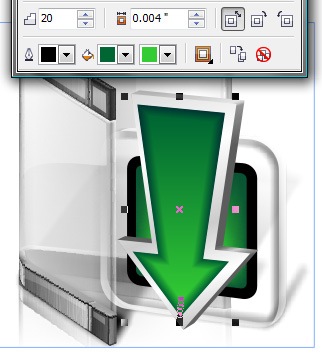 | Step 8:
With that done, we are back to the basics. We need to create some gloss for our arrow, and tweak the gloss on the glass plate behind it.
 | | Step 9:
I am going to combine our last 3 steps together, because they will be the same for the rest of the User folders. You can check out day 9 and 10 for more information.
To polish things off we create a reflection for the front of the Wrapper. Once we have that we are free to use our shadow and reflection techniques.
 | Finished Icon:
This gives us our new Downloads folder, and will provide us several new assets for later in the project.
 | |
Wrap Up:
Tomorrow we will move on to one of the other new User folders, "Links." This will be very similar to what we have done today, so it should be a breeze. I will take the opportunity to go into a bit more detail on some of the more obscure techniques we used today. Hope to see you then.
About Me:
You can find all my skins, tutorials, and articles, on my Wincustomize Homepage, at http:\\mormegil.Wincustomize.com. Questions on icon use and techniques, can be emailed to mormegil@gmail.com. Twitter users can find me with the user name: Mormegil.
|
Find all the Icon-A-Day tutorials, and links to the icons and more at the Icon-A-Day 2.0 Index.
All Icon-A-Day artwork, copy, and icons, are copyrighted by Paul Boyer © 2008, and may not be used with out express permission. |