 My original plan we to do a Video tutorial of today's icon, however after I got all the assets together I realized there was nothing particularly difficult. I realized that we can pretty much do today's icons by just tweaking our existing assets. So it looks like our first Tutorial Video will have to wait for a bit, but some videos will be coming along soon. Promise. My original plan we to do a Video tutorial of today's icon, however after I got all the assets together I realized there was nothing particularly difficult. I realized that we can pretty much do today's icons by just tweaking our existing assets. So it looks like our first Tutorial Video will have to wait for a bit, but some videos will be coming along soon. Promise. |
Day 14 (Friday, August 22th, 2008)  |
|  The Videos Folder The Videos Folder
Yesterday I mentioned that the Music folder was one of my favorites from the original series. Today we will do one of the icons I was never happy with: the Videos folder.
The thing I did not care for on the original Videos folder was the film reel. Luckily I did create a clapper for the Video file, so we have something else to fall back on. So with that said, we are going to ditch the film real for good.
|
| Step 1:
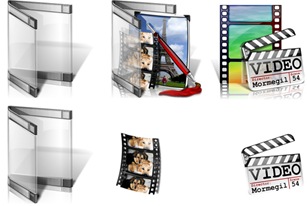
Let us start by getting our assets together, and removing the objects that we don't need.
You can see our original Icon-A-Day 1.0, Video file in the line up.
 | Step 2:
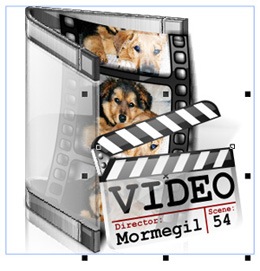
Now, just to make sure our basic composition works I move all our original assets together. If we were in a hurry, we could probably use this as our final icon, but we will be doing some tweaks to sexy things up a bit.
 | | Step 3:
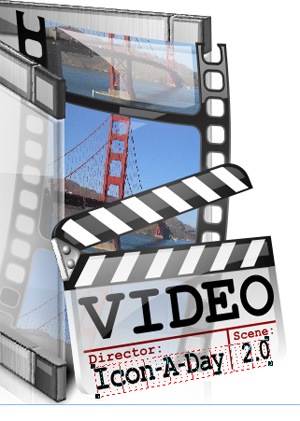
The first thing I want to do is replace the film images with something a bit more colorful Iin order to do this I'm going move the film strip out on its own for a bit.
Then, using the same techniques we used on the photos folder, I bring in a new image, duplicate it 3 times, and skew and crop the images to where they fit in the film.
 | Step 4:
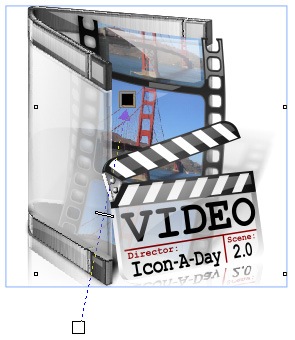
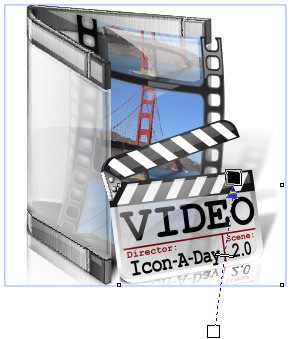
Now I want to change the copy on the clapper. I do this with the standard Text tool, and the Perspective tool.
 | | Step 5:
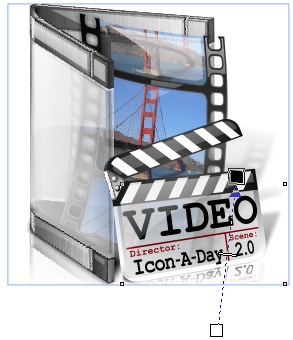
Now we we start fixing some things. It looks like we can re-use the shadow on the video file. But we will need to crop it where it hits the back of the folder.
I can also use the shadow, for our drop shadow by skewing it and dropping it behind everything. Then I fade it out with the interactive Transparency tool.
 | Step 6:
Now we use shadow and reflection techniques to polish things off, starting with a few new shadows,
 | | Step 7:
Last we finish off the the reflections, starting with the reflections in the folder front, and finishing up with the traditional floor reflection.
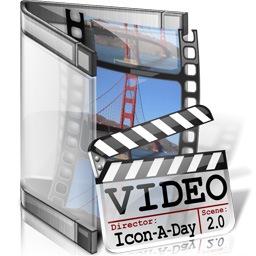
 | Finished Icon:
Here we have our the last of our classic "My" User folders.
 | |
Wrap Up:
With the Videos folder we come to the end of week 3 of our Icon-A-Day 2.0 tutorials. I'll be back Monday with another User folder, and since we are just about out of the classics we will need to create something new from scratch.
About Me:
You can find all my skins, tutorials, and articles, on my Wincustomize Homepage, at http:\\mormegil.Wincustomize.com. Questions on icon use and techniques, can be emailed to mormegil@gmail.com. Twitter users can find me with the user name: Mormegil.
|
Find all the Icon-A-Day tutorials, and links to the icons and more at the Icon-A-Day 2.0 Index.
All Icon-A-Day artwork, copy, and icons, are copyrighted by Paul Boyer © 2008, and may not be used with out express permission. |